When you click on Advanced in any of the printing sections of PrintPRO, a screen something like this will appear.

Here you may change the words that are used for titles, control what data appears, and specify fonts. A check box at the top of the page allows you to specify that dates will be formatted in Spanish.
An important feature allows you to change the way the items will be spaced on the page. These controls are on the last tab in Advanced which is labeled Layout.
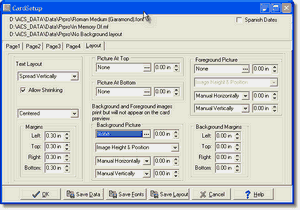
A selector in the upper left hand corner of the page lets you chose from three types of vertical spacing for the text. Centered Vertically locates the text a little above center as we think this is more pleasing to the eye than using the exact center. Spread Vertically adjusts the spacing between sections to fill the entire space. Choosing Manual Spacing causes two additional fields for the Top Offset and Spacer size to appear. The next selector allows you to choose whether the text will be centered horizontally or aligned to the left or right margin. As this is written, Acknowledgement Cards are all centered horizontally, but this may have changed by the time you read this as we plan to add the horizontal spacing control everywhere.
The choices you make in the Text Layout section of this page are all stored in your Data Set. The second column allows you to specify whether there will be a picture at the top or the bottom. These settings are also part of the data set and the pictures you select will be part of your preview.
The remaining items on this tab store in the Layout Set. The margins set at the bottom of the first column define the area in which the text will appear. You will probably not need to change Margins on Prayer Cards or Memorial Folders unless you are using a background image or your printer is clipping the output near the edges of the paper. All printers have an area at each edge of the paper in which they can not print. To determine whether you need to adjust the margins to compensate for your printer's unprintable area, print a job on plain paper with the Show Alignment Borders Box checked. If the printer has cut off the boxes that show the text area, adjust the margins until all sides of all of the boxes print. The program fits the text into the margins defined here so counter-intuitively it may be necessary to define a bigger rather than a smaller bottom margin to keep keep your printer from clipping the bottom edge.
With Acknowledgement Cards and Register Books, adjusting margins is the preferred way to deal with pages with panels or borders. You might want to bring down the top margin to clear a pre-printed heading, or bring in one side margin to clear a border, or both side margins to shorten the lines of text in your verse.
The Advanced section also allows you to specify pictures and clip art and set their sizes. You can separately specify pictures at top or bottom using fields that look like:
![]()
When you click on the 3 dots at the right of these fields, you will see
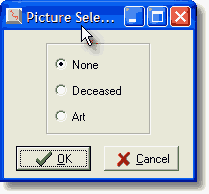
Select None and click OK for no picture. Select Deceased and click OK for a picture of the Deceased. Select ClipArt and click OK to bring up the screen to choose your Clip Art.
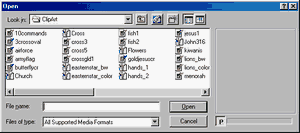
Click on the image of your choice to highlight it, and then click Open to copy the name of your image into the picture field.
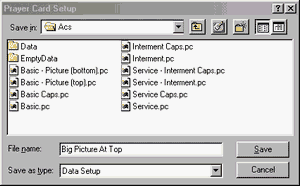
A word of caution is required. If you select say Basic and Roman Small and make changes here and exit by simply clicking on OK, you will be changing the Sets we defined for you. If later you install an update, your changes will be lost. The solution is to save your changes into a new Set with a name of your choosing. Say for example you wish to make a special Set with a larger than normal picture without losing your regular setup. The best way to do this is to first choose a Data Set with a picture, say Basic - Picture (top), click Advanced, change the Pic Height as you wish and click on Save Data to bring up the Setup screen.
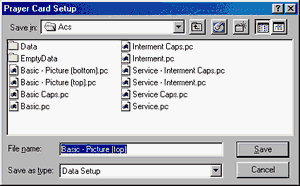
If you simply hit save, it would overwrite your existing file and we don't want that. So first choose a new file name like Big Picture At Top and type it in the File name box. It would be a good practice to select names that are distinct from the names we use. Good choices might be Frank's Big Picture At Top or CookFH Big Picture At Top.
Now when you click on Save and return to Advanced you will see that the Selected Data Set has changed to your new name.
![]()
Then when you click on OK to close the Advanced Screen you will see that your new Data Set has been added to the Select Data List and is available to be selected in the future without having to go into Advanced at all.
![]()
A similar procedure would allow you to make a new font set. In advanced, click one of the ellipses to bring up a Font selector dialog to change the font for the field you selected.
.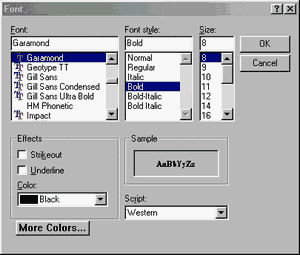
All of the fonts installed on your computer will appear in the list. You may also specify a Color other than Black and you can even click on More Colors to bring up a Custom Color Dialog to exactly match the color of a particular ink.
A similar procedure allows you to create your own layout sets. The layout sets store whether there will be a background or foreground picture. These pictures are distinct from the basic one that appears in the text. A background picture will be behind the text. A foreground picture will be in front of the background. Neither of these pictures appear with the text in the preview.
Do not use a Data Set that includes a picture when you choose a Layout Set with a Background. If you want to have a picture of the deceased appear over a background, choose a Data Set with just text and choose a Layout Set with both a background and a foreground picture. Adjust the Text Margins and the Foreground Picture position so that the text and the picture do not overlap. Checking Show Alignment Borders will draw boxes to aid in making these measurements.
The Register Books Tab contains two Advanced Buttons. The Advanced Button on the right is for adjusting what appears on a particular page. It operates just like the Advanced Buttons on the other tabs. The Advanced Button on the left is for adjusting what pages appear within a given book layout.
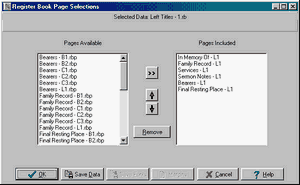
To add a page to the Book, highlight it on the left and click on the >> key to move it to the right. To remove a page from the Book, highlight it on the right and click on Remove. The up and down arrow keys allow you to reorder the pages.
If you use a particular customized Register Book layout, you will want to use the SaveData feature to save your Book and Pages under a unique name so that they will not be overwritten when you update the program. This is a three step process. First, use the SaveData under Page Advanced to save each page to a new name such as "In Memory Of - MyFuneralHome." Second, use the SaveData under Book Advanced to create a new Book name such as "MyRegisterBook." Finally, use the controls in Book Advanced to remove the standard pages from the list of included pages in MyRegisterBook and to replace them with the MyFuneralHome pages.