Double click on the Arranger icon on your desktop to bring up the program's Main Menu.
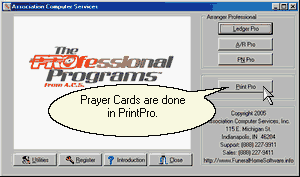
Click on the Print Pro button or press the P key to bring up the Find a Case Screen. Hitting the P key works because the P on the Print Pro button was underlined. Underlined characters on buttons mean that hitting that letter (or alt and that letter if you are in a place where hitting a letter would be interpreted as data) operate the button.
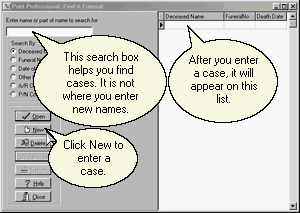
This is the Find a Case Screen. If you are just starting out you will not have any cases listed to Open yet, and so you should click on New to enter your first case.
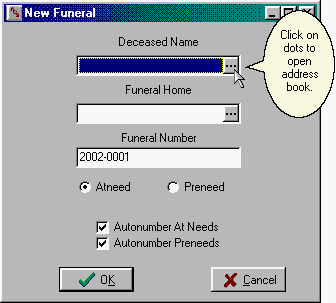
The first two fields have an ellipsis (three dots) at the right which tells you that they call for a Name or Place. Click on the ellipsis to bring up the Address Book.
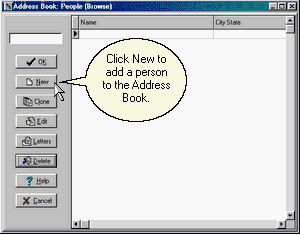
This is the Address Book where you look up people you have dealt with in prior cases. If you are just starting out, this will also be empty and you'll want to click on New again. However, if you had been using the program for a while, the person who is now deceased might have already been in your system as a relative in an earlier call, so you'd want to check your Address Book for the name before hitting New and creating a possible duplicate.
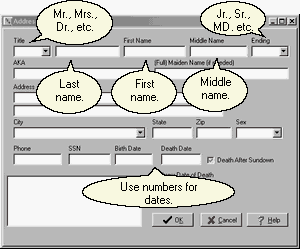
This is the screen for entering information about a person. Since our object is to do a Prayer Card, all we need to fill in is the name and the dates of birth and death. This screen is discussed in greater detail elsewhere.
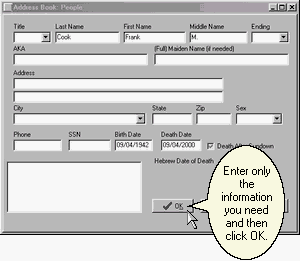
When you have the information entered to your satisfaction, click on OK.
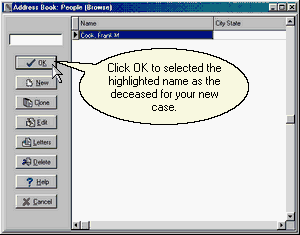
This took you back to the Address Book but now the person you entered is on the list. Click OK again to indicate that you wish to create a new case with that person as the deceased. The New Funeral Screen may appear briefly depending upon the speed of your computer, and then the program will automatically open the Address Book for you to specify the Funeral Home.
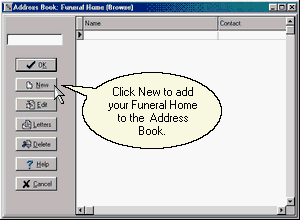
We have returned to the Address Book, but unlike before when we were shown People, this time we are shown Places. If this is our first time using this list, it will be empty and we need to click on New to enter our first Place.
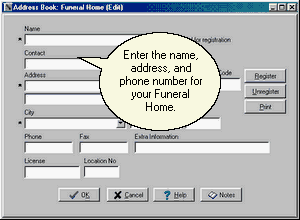
Enter the information for your funeral home. Ignore the boxes about Registration. We will help you fill in those boxes after you decide to purchase the program. When you enter the phone numbers if you start with a ( to enclose an area code), the program will enter the rest of the punctuation for you.

Click on OK to save this information and return to the Address Book.
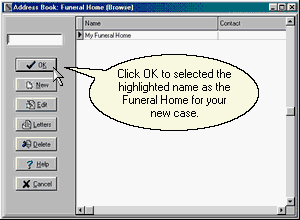
Then click on OK again to use this location for your case.

The program has automatically entered a Funeral Number which you might want to change, but since we're just printing Prayer Cards we'll leave the number alone and click on OK. If you want to tell the program not to automatically number your cases, remove the check marks first.
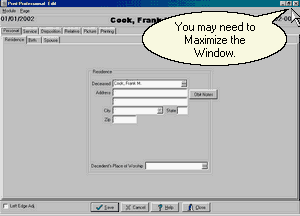
This opens our case and places us on the Personal Tab. At this point you may wish to click on the square box symbol in the upper right hand corner of the window to maximize the window. On many monitors, this window looks better maximized.
If we were printing Memorial Folders, Acknowledgements, Register Books, or Miscellaneous forms, we'd need to click on the intervening tabs to enter more data. However, since our object is to print a Prayer Card and we've already entered a name with dates of birth and death and a funeral home location, we can simply click on the Printing tab at the right end of the list of tabs.
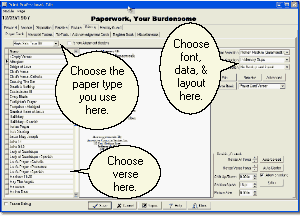
Several items on this screen have been set to standard values by default. Once you start using the program these values will be reset to reflect your most recent choices. You should see a list of verses on the left with the arrow indicating that the initial choice is "<Empty Verse>". Immediately above that is the paper size selection box which is initially set to "Both Sides Tear Off". This choice is for 8-up prayer cards on an 11" sheet of paper with a tear off strip on each side. Clicking the arrow to the right of this choice brings up a list with other choices. Further to the right you will see a selection for fonts which should be initially set to "Roman Small(Garamond)" and a selection for data which should be set to "Basic.pc". Later you'll want to experiment with other fonts and data choices; however, for now please accept the initial settings unless for some reason any of these boxes start out blank in your version. In that case, you will want to click on the arrow to the right of the blank selection and choose something, preferably our standard choice.
Double click on Afterglow in the verse list.
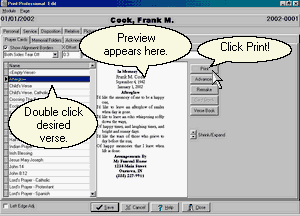
The card on the right will remake itself with the Afterglow verse. Now click on Print.
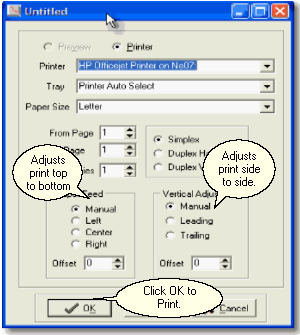
The Report Setup screen appears with your default printer selected and Copies set to 1. If you have more than one printer and need to change from the selected printer, you could click on Setup; otherwise simply click on OK to print your first sheet of cards. You would also use Setup to specify manual feed if your prayer cards are not in the paper tray. If you have not yet purchased the program, a message may appear warning you that the chosen funeral home location is unregistered. Do not be concerned about this message. It simply means that Sample will be printed on your output until we issue you a registration number on purchase. Click on OK in this warning.
Finally, click on Close and Close again to return to the programs Main Menu, or click on Close a third time to return all the way to your desktop.