Clicking on New from the Find a Funeral Window will create a New Funeral. You can create a New Funeral from any module. Once you have created it in one module if you need to use it in another module you should Open and not create it a second time.
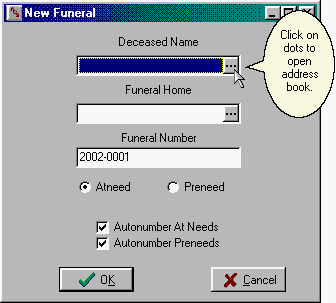
The first step is to specify the name of the Deceased and so so click on the ellipsis (3 dots) to the right of the Deceased Name Field and your Address Book opens. You see a list of all the People whose names are already in your computer.
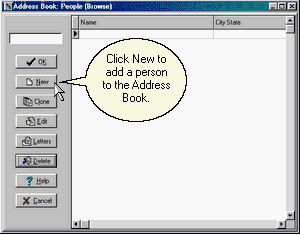
At first the list will be empty and you will need to click on New to add your first person. If you only have a few names you will be able to see all of them immediately, but when your list becomes long you will need to enter the beginning of the last name to scroll the list to the proper part of the alphabet. If you see that the name is already on your list, click on it to highlight it and click OK. You may also double-click on the name. If the name is not on your list, click on New to open the People Entry Window.
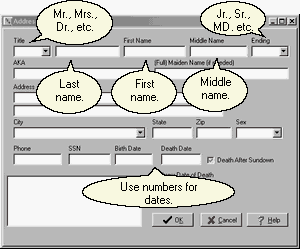
This is a good place to remind you that you don't need to fill in every field just because it is there. Think about the things you plan to print and fill in the information you need and skip the rest unless you have to need to record the information for future use. Fill in the fields and then click on OK. You will be returned to the list of People and your new name will have been added. Now you may click on OK again to select that name as your Deceased.
After you have chosen the name, the New Funeral Window will appear briefly with your chosen name included and then the Address Book will open again automatically to allow you to specify your Funeral Home location.
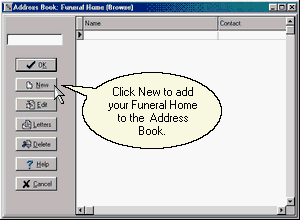
We have returned to the Address Book, but unlike before when we were shown People, this time we are shown Places. If this is our first time using this list, it will be empty and we need to click on New to enter our first Place. Once you have entered your funeral homes, you need only select them from this list.
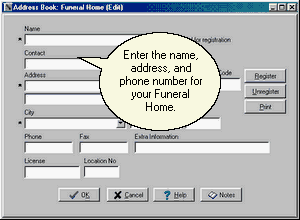
Enter the information for your funeral home. Ignore the boxes about Registration unless you are on the phone with a support techician. If you begin a phone number with a ( to enclose the area code, the program will add the rest of the punctuation automatically. Click on OK to save this information and return to the Address Book.
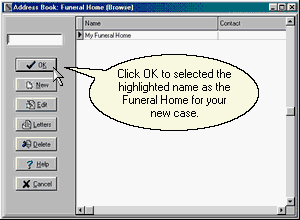
Then click on OK again to use this location for your case.

Funeral Numbers are optional. You'll probably want to enter them if you are using LedgerPRO, A/R PRO, or P/N PRO, but ignore them if you are only using PrintPRO. The program automatically supplies a number in the format shown above. If you do not want the program to autonumber, remove one or both of the check marks on this screen. If you want automatic numbering but use a different format, leave the check marks but change the number for your first case. The program will assign a number one higher for your next case.
A radio button allows you to specify that the case is a preneed. The default value will be at-need cases unless your are in P/N PRO.
When all of the information is correct, click OK to create the new case.