Once you have created a Contract or a Standard Service, you can add transactions to it.
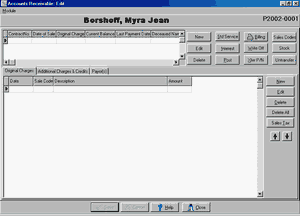
Using Standard Services greatly simplifies the process or adding transactions. If you have created Standard Services, just click on the Standard Services Button at the top of the Accounts Receivable Edit Screen and a list of your Services will appear.
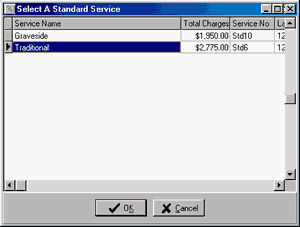
Select the Service name that is most appropriate and click OK and all of the transactions from that Standard Service will be copied into your Contract or Service. Yes, you can copy one Standard Service into another one or copy more than one Standard Service into a single Contract.
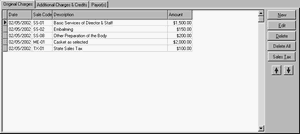
Notice that this Standard Service included a transaction for a Casket without a price. Including items without prices in your Standard Services simplifies completing the actual contract. Select the Casket Item and click on the Edit button to the right of the transactions to bring up the screen to edit this transaction.
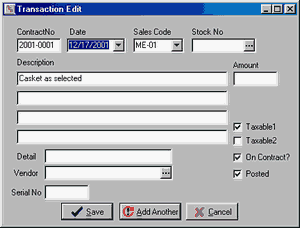
Fill in the price or better yet enter a Stock Number and click on Save or Add Another. Either button will add the revised item to the list. Add Another clears the Edit Window so you can create more transactions while Save takes you back to the transaction list.
Clicking on the New Button to the right of the transaction list opens the same Transaction Window we just discussed. When we saw this window before the Sales Code (ME-01) had been filled in from the Standard Service, but when you enter a new transaction you will begin by specifying this code. In a new contract the first charge is normally of type SS-01, the Basic Services of Director and Staff. SS indicates Services Staff. The casket charge was an ME or Merchandise Item. Other types are SU (Services - Use of Facilities), SA (Services - Auto), SP (Services - Package), CA (Cash Advances), etc.
Stock provides a short cut for filling in all the other fields for this item. Click on the three dots to bring up the stock list for items matching the specified Sales Code.
Two taxable checkboxes are provided. Your State may not charge Sales Tax in which case you may ignore these checkboxes. If your State taxes some items and not others, check the Taxable1 box on the items subject to tax. Some States have more complicated tax rules which bring both checkboxes into use. By default Taxable 1 is checked for Merchandise items; you may change the default conditions of the Tax checkboxes by modifying the Sales Codes.
The Posted checkbox indicates whether the transaction has been sent to an integrated bookkeeping program. It is not normally necessary to check or uncheck this box manually.
The On Contract checkbox indicates whether the transaction is part of the Original Contract or belongs in Additional Charges and Credits. You may have noticed that tabs above the transactions carry these designations. Normally you will place a transaction on one tabsheet or the other by selecting that tab before you add the transaction; however, you can move a transaction to the other tabsheet by adding or removing the check in the On Contract box.
Additional Charges and Credits does not mean items over and above your standard offering. It means items selected after the FTC mandated contract was prepared. Payments not made at the time of the original contract would go into Additional Charges and Credits as would Interest. While payments may be added within the contract just as any other item, they may also be added using the Payments Button that appears on the Find A Funeral Window when Search By is set to A/R Contracts.
Separate Buttons are provided to Delete and to Delete All. The first button deletes only the selected transaction which Delete All deletes all of the items in a single step.
The red arrows pointing up and down allow you to change the order of the transactions. Select a transaction and click on the up arrow to move it higher in the list or the down arrow to move it lower.
When you have entered all of your contract items, you add Sales Tax by clicking on the Sales Tax button at the top of the screen. This will add tax using the rates entered into the contract taking into account the checkboxes in the individual items. Interest transactions are also added using a button at the top of the screen.